Kegging your beer is one of the most rewarding decisions in homebrewing. It shaves hours off your brewing process by dramatically streamlining your bottling process and you get the ultimate control for adjusting your carbonation. Plus you get the extra satisfaction of seeing your beer served through a faucet.
However, the convenience of kegging comes at a cost. Apart from the financial investment of the basic kegging equipment, you have the additional cost of needing some sort of device to chill 5 gallons of beer to a serving temperature. This typically means the purchase of a separate refrigerator or freezer along with faucets and shanks. For people who live in an apartment, the luxury of the additional space may not be feasible. Additionally, when going to a party or event, it is either necessary to bottle up some beer (which takes time and doesn't match the carbonation levels that you had in the keg) or transport your keg, CO2 system, and some way to keep the beer cold. For those who have a large multi-tap jockey box, transporting a 48 quart cooler with you for one keg isn't the most fun or efficient approach.
I figured that the concept of a smaller single keg jockey box can actually provide a way around both the large initial investment of a keggerator in money and space but also provide a way to easily transport and serve your beer on the road. While ultimately designed for the road, it would be possible to simply use it at home to serve beer from warm kegs, only needing to add ice prior to serving.
The basic requirements for the "mini-chill" were that it chill a beer down at least 20 F from ambient temperature, be small enough to fit on top of a keg and transportable with a keg, cost less that $50 to assemble, and be "powered" by the contents of a normal refrigerator ice machine. I wanted it to be something that almost anyone could easily assemble with tools from around their house as well as something easy to clean. Finally, my goal was to be able to balance the system to accommodate for the proper carbonization maintaining pressure and serving pressure to include line loss (this is a big variable depending on how you choose to create your system).
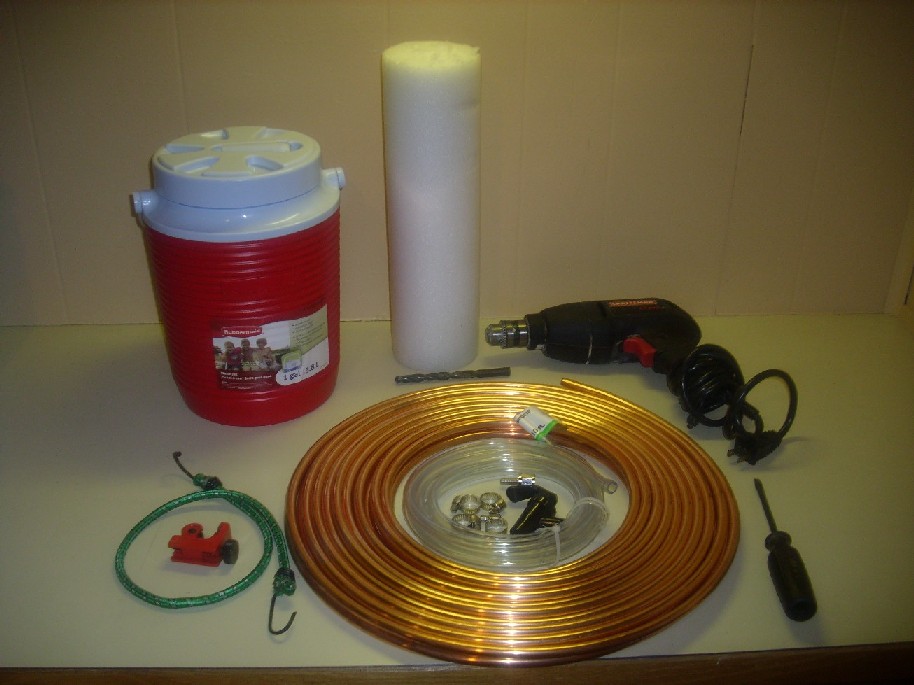
With these considerations in mind, I envisioned a small cooler with a chiller coil and a basic in and out hose connection to attach your keg and a basic cobra faucet. You can create this system and only need the following tools:
Screwdriver (flat head)
Drill with 3/8" drill bit
Something solid between 3-4 inches to wrap tubing around
Newspaper - preferably the World and Sports sections
Optional: tube cutter (if you buy more tube than you need)
All you will need to assemble your mini-chill is:
1-2 gallon Rubbermaid cooler: $8-$15
20-60 ft 3"8 OD / 1/4" ID copper tubing: $20-$60
1" ¼" screw-in barb: $1.00
4 hose clamps: $2.00
2-3 ft ¼" ID vinyl hose: $0.50
1 cobra head faucet: $6.00
1 bungee chord: $1.00
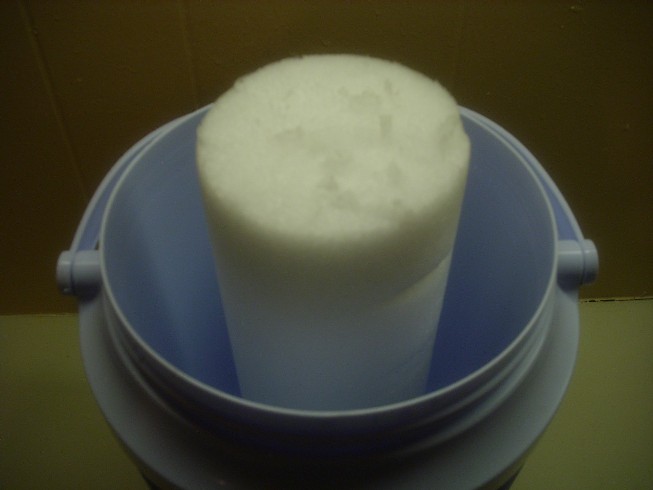
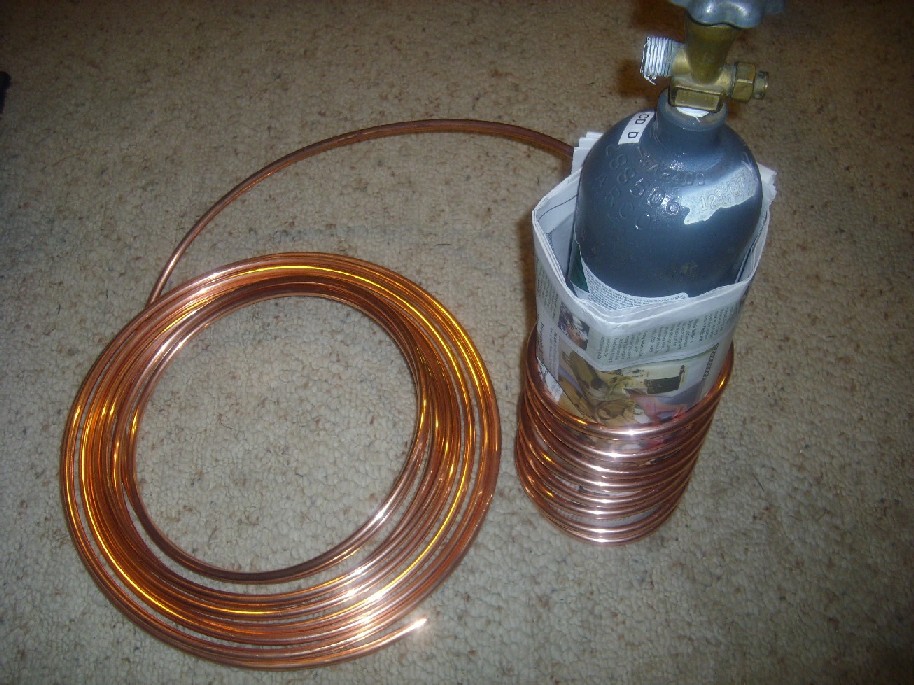
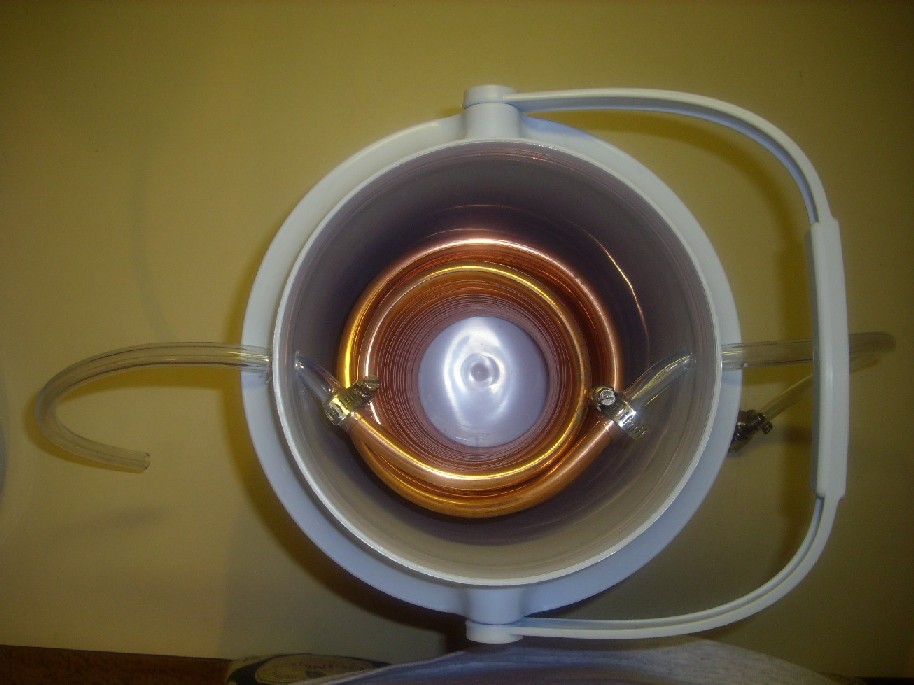
Once you have the above equipment, the time to build the mini-chill is less than one hour. First, you find out whether the item you plan to wrap the tubing around fits within your cooler with at least 1 inch to spare around it. This will give you space to wrap the coil around and also allow for water and ice circulation to keep the device chilled. We are going to create a "double helix" with one tubing helix leading down and one coming back up.
I have found that for a 2-gallon container, a slim 5 lb CO2 canister fits well. Ultimately, whatever you have around will work. Simply place the canister in the cooler and mark off a spot roughly 1 inch below the top of the cooler. For a 1 gallon cooler, you can probably find something else around the house that is about 4" in diameter.
The next thing that you want to consider is line pressure. Ideally, you'd like to have a balanced system so that you could apply an appropriate level of pressure on the keg to maintain carbonation and dispense the beer without foaming. This can be a bit difficult to get to work out, but it is still worth trying. The biggest problem is that when your keg is warm, it requires a much higher level of pressure to maintain the desired carbonation level. This means that a lot of line resistance is needed to get down to serving pressure. The good news is that with more copper tubing, your temperature and pressure drop can be greater. The bad news is that the resistance of metal tubing is a lot lower than plastic tubing. You can find values for line pressure loss at: http://kegman.net/balance.html

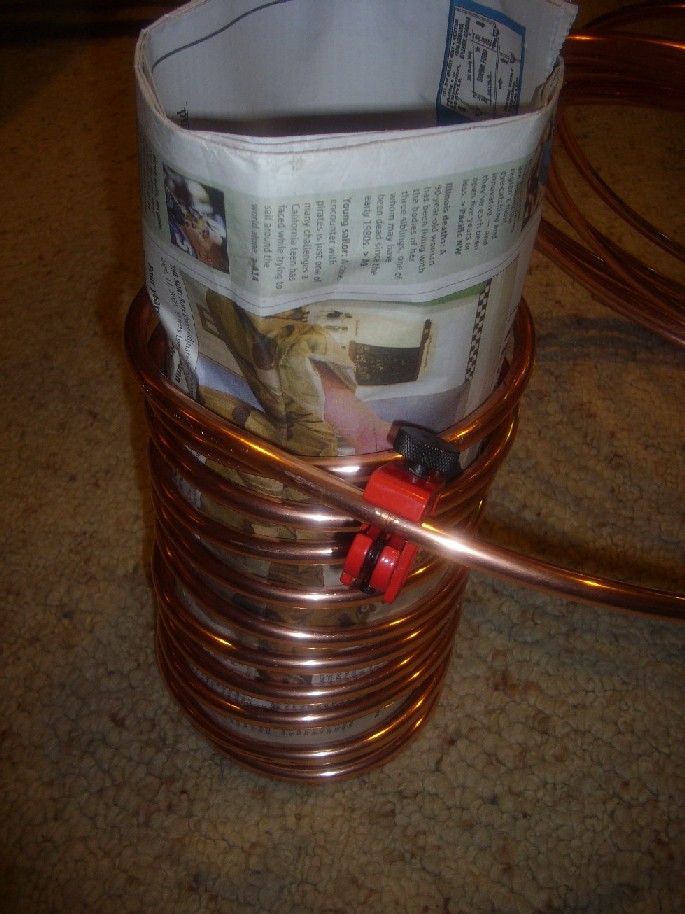
Once you are all ready and know how much tubing you want to use, you can begin wrapping the copper coil around your "mold item." As you wrap the copper coil, there are a few things that you want to keep in mind. First, you want to maker sure that you don't "kink" the coil. Bending the coil too fast or too sharply will cause kinks. As long as you take the wrapping processing smoothly and slowly, this should not be a problem. In the following picture, you can see how you begin wrapping the coil. I like to start from the ground and turn the coil up the item, feeding more tubing from the bottom and slowly working the coil up the wrapping item until you work yourself up to the line that you have marked. While wrapping the tubing, I want you to keep in mind that you want to use half of the tubing on the inside of the "double helix" and one half of the tubing on the outside.
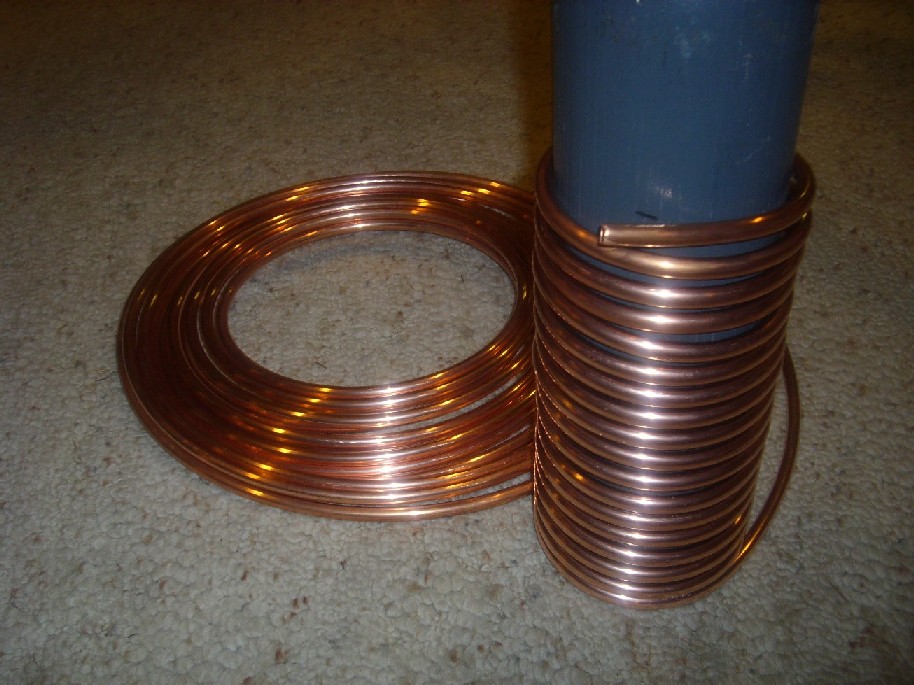
As you work your way though this process, depending on how much tubing you have, you can adjust your spacing to provide an even distribution. Slowly work your way up the wrapping item, keeping some space in between spirals to allow for fluid flow.
Once you've reached the mark that you placed on the wrapping item, you are going to wrap the current coil with your newspaper. This will provide some spacing between the outside coil and the inside coil. Once the newspaper is in place, begin wrapping the tubing back up the coil, keeping an appropriate spacing to allow water flow.
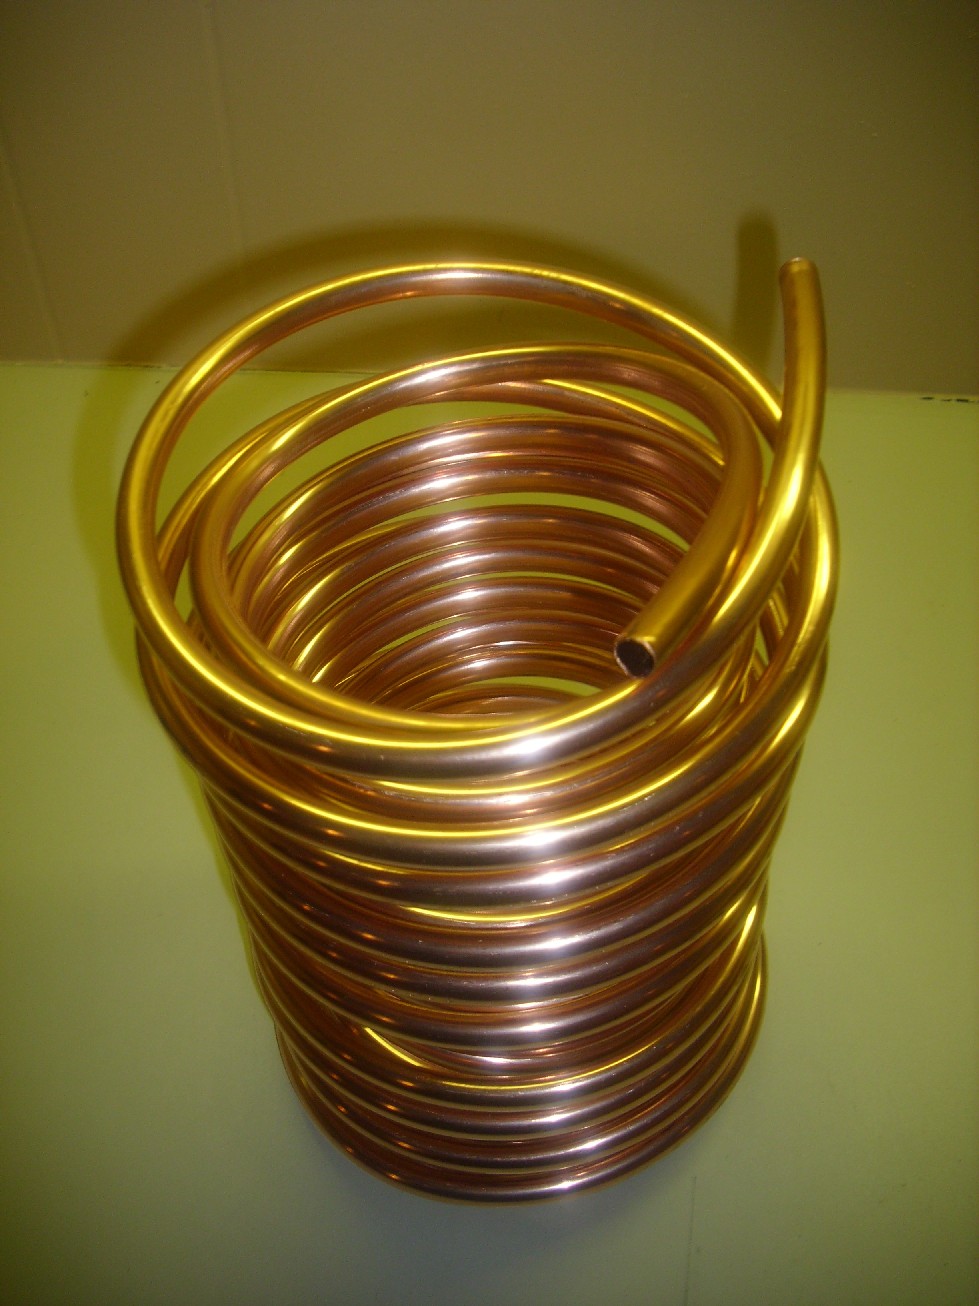
This part may be a little more trying but keep being patient and gently work the tubing around the paper. Once you've worked your way back up to around the same height that you started the wrapping, you are ready to cut the tube (if you have a tube cutter). If you bought the perfect amount of tubing, you can space the coils to get you right back up to the starting height.
After you have cut the tube or spaced the spirals to the appropriate balanced spacing, you can work to slowly pull the newspaper out. Depending on how hard you wrapped the tubing, this may be a bit difficult, but as long as you are patient and gentle, I assure you it will come out. After all is said and done, you want both of the ends of the coils to be at about the same level.
Now you can turn your attention back to the cooler. First, mark two nice high spots underneath where the lid secures that you can drill two holes in: one on the front and one on the back. Once you have those spots marked out, drill your holes with the 3/8" bit (if you have smaller drill bits, I recommend pilot drilling the holes up to the 3/8" size.
Once you've gotten the holes drilled, it is time to start assembling the chiller. First, take a pot of water (at least 1" deep) and bring it to a boil. Once it is at a boil, dip in 1" of your vinyl tubing for 5-10 seconds. Take it out and press it onto one end of the inside coil of the copper tubing. (Due to the spacing of the chiller, the inside coil tends to be the side closest to where the ice accumulates. This makes the inside coil just a little bit cooler and makes it best for serving the coolest beer out the faucet.)
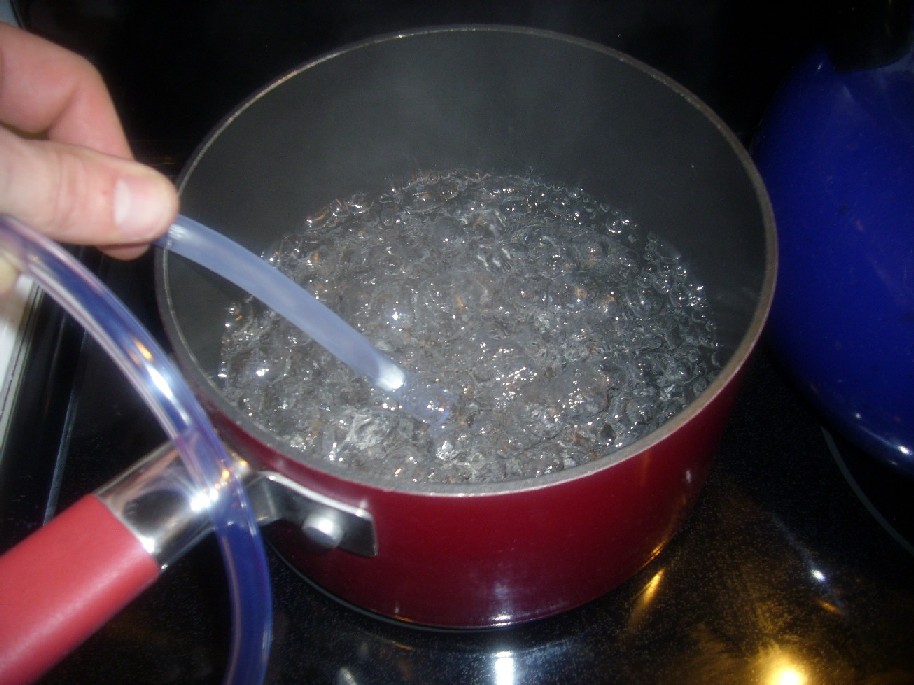
It may take a few pushes, but it will get on there. Try to get about a half of an inch onto it. Once you have it on, cut your tubing off you that you have about 1- 1.5' of tubing. Take the rest of your tubing, dip one end of it in, and attach it to the other end of the copper tubing. One this end, you only really need about 6-12" of tubing.
Next, secure the hoses with hose clamps. Honestly, with the tightness of the fitting with the hoses, this may be unnecessary, but nobody wants to take chances with leaking beer. Then take the coil with the two tubes attached and place it in the cooler. Thread one end of each of the vinyl tubing out of each of the holes drilled.
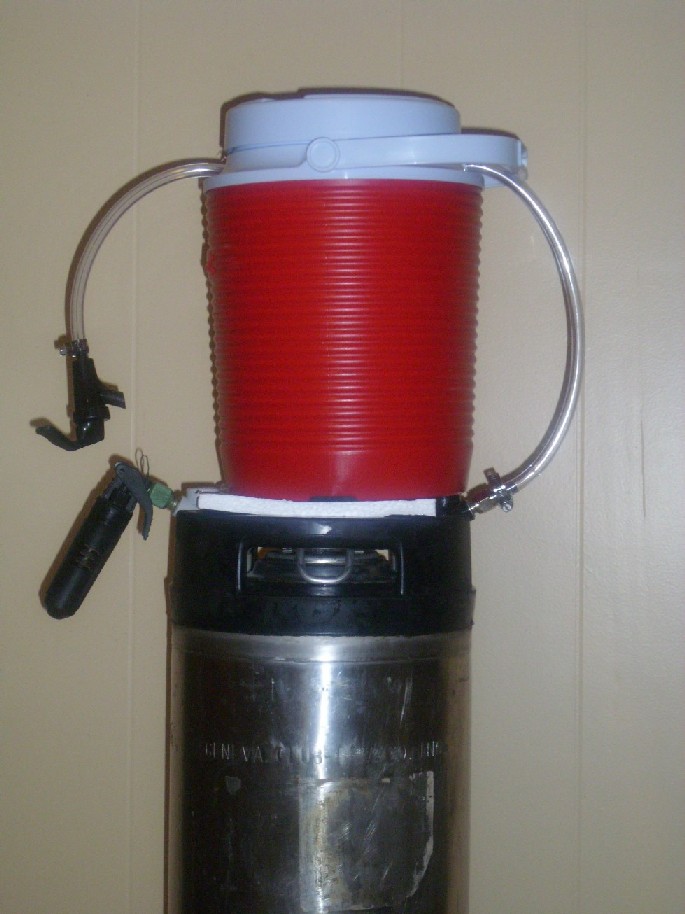
Attach the ¼" thread-in fitting to the longer hose using a hose clamp and attach the cobra faucet to the other head with a hose clamp as well. Once you are done, all you have to do is attach a ball or pin lock dispense fitting and attach it to a keg. If you use one of the handy mini-CO2 injectors, you have the ultimate system for keg transportation. By adding a small piece of wood or Styrofoam, you can balance the mini-chill perfectly on your keg between the in and out fittings.
All you need to do now is add ice and a bit of water. By adding water, you help ensure good heat transfer. Simply add ice and then top with water up until you reach the height of the vinyl hose connections.

Alright, time to try the system out. Just connect your threaded "out" fitting of choice and load it up with your ice and water. If you have a regulated CO2 system, aim for the proper balance for the beer. If you are using a CO2 injector, focus on dispensing at a proper dispensing rate and carbonation.
Cleaning your single keg draft box is relatively easy as well. For an initial cleaning, I recommend flushing the system with hot PBW or Straight A to break up any surface contaminants. After this flush, rinse it with some hot water and then you can run a sanitizer through it like StarSan, One Step, or Iodophor. At this point it should be ready to serve your beer. Just get the sanitizer out of the lines either by flushing it out with beer or simply draining it out.
After you are done using the draft box, I recommend flushing the lines with StarSan or One Step like you would for a normal jockey box to prevent any beer from spoiling in the lines. With the way that this system is designed, it is very easy to take out the coils and drain them by flipping them over and rotating them around to encourage water or beer still in the lines to work its way out.
With your new single keg jockey box assembled and filled with ice, you are ready to head to a party or just serve some nice cold beer at home without the large electric bill!